Exploring The World Of Commercial Plumbing

The plumbing division of the construction industry is more complex than many people realize. From residential to commercial, there are key differences in the design and installation of plumbing systems that must be understood.

Proper plumbing installation and maintenance prevent issues like leaks, low water pressure, and clogged drains. Akron Plumber also helps ensure compliance with environmental standards and energy efficiency.

commercial plumbing

What’s The Difference Between Residential And Commercial Plumbing?

Residential plumbing focuses on the installation, maintenance, and repair of piping systems and fixtures in homes. Commercial plumbing, on the other hand, deals with larger buildings and facilities that are used by many people daily. This means that they have to cope with more wear and tear, and any problems are going to be more catastrophic than in a home.

Commercial spaces also require more outlets and pipes for sinks and toilets, as well as larger water pressure to accommodate the higher usage. This can make it harder to diagnose and fix plumbing issues, as the piping may be more complicated and have multiple components. In addition, it can be difficult to locate a leak in a large building, such as a skyscraper, that has multiple floors and miles of pipes. This can lead to huge water bills and costly repairs.

What’s The Difference Between Commercial And Industrial Plumbing?

A commercial plumbing system is used in offices, malls, high-rise buildings, and more. These systems are used by more people than residential plumbing systems, which means they take on greater wear and tear over time.

This constant, heavy usage increases the risk of damage. Something as simple as a broken pipe can be devastating to a business. Having an expert plumber that understands the ins and outs of commercial plumbing is essential.

Industrial plumbing serves the specialized needs of industrial facilities such as factories, warehouses, and manufacturing plants. These systems are designed to transport large volumes of water, chemicals, and other fluids. They also must abide by strict regulations and safety standards set by government agencies. This requires specialized equipment and more complex piping networks.

What’s The Difference Between Commercial And Retail Plumbing?

Commercial plumbing involves the installation and repair of larger plumbing systems in business premises, large housing complexes, and other non-residential spaces. This is a specialized field that requires expert knowledge, adherence to stringent regulations, and extensive experience.

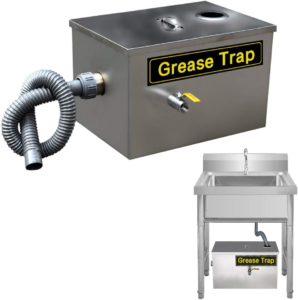
Many businesses have different requirements, such as restaurants needing grease traps or hospitals requiring hygienic water systems. Commercial plumbers are also likely to work outside of normal business hours and must have specific insurance coverage.

Additionally, commercial plumbing often consists of more complicated fixtures than those found in homes, such as urinals and toilets, which are designed for higher volumes of waste. These fixtures are also designed to prevent clogs and have features that make them easy to clean and drain. Similarly, commercial sinks and faucets are typically larger to handle the higher volume of usage. As such, these features need to be more durable than standard household ones.

What’s The Difference Between Commercial And Hospital Plumbing?

A commercial plumber works with larger plumbing systems in business premises and other non-residential properties. These include offices, hotels, shopping centers, restaurants, and more. These systems typically have bigger pipes and can handle more usage than residential plumbing.

Commercial plumbers must also know how to deal with different building codes. For example, hospitals have their own set of requirements that differ from other businesses. And if you’re working on a multi-story building, you need to consider how gravity affects water pressure.

Additionally, commercial plumbers often work outside of regular business hours. This is because they need to ensure that business operations are not disrupted while addressing plumbing issues. They also need to be prepared for emergencies. This means they need to be equipped with the right tools and materials to respond quickly. Also, they may need to coordinate with other tradespeople and architects to ensure that all the building’s plumbing requirements are met.

What’s The Difference Between Commercial And Restaurant Plumbing?

Leaky taps and clogged drains are problems that can impact anyone, but they’re especially dangerous in commercial spaces where people work. They can lead to lost productivity, expensive repairs, and even serious health and safety issues.

Plumbing systems in commercial settings have to be bigger and more complex than residential ones, and they’re also subject to stricter regulations and codes. Look for a plumber who has experience working in commercial environments, and make sure they can provide emergency services around the clock. Commercial kitchens require more exotic fixtures, like industrial dishwashers and waste grinders. They also need to accommodate high-volume usage and be compatible with a variety of temperatures.

What’s The Difference Between Commercial And Office Plumbing?

Commercial plumbing is the installation, repair, and maintenance of plumbing systems found in office buildings, malls, high rises, retail spaces, healthcare facilities, food establishments, and much more. These are larger-scale, complex plumbing systems that need to adhere to stricter building codes and manage a higher volume of usage than residential properties.

These structures typically have multiple floors that need plumbing services, such as toilets and sinks. Many also need larger pipes to handle the higher water demand and ensure sanitary conditions.

As a result, commercial plumbers often work outside of regular business hours to minimize disruptions and keep businesses running smoothly. They also need to understand and be able to follow detailed plans and specifications when installing plumbing. These skills are essential to managing large, complex plumbing projects and ensuring the safety of occupants. The risk level for commercial plumbers is therefore higher than with residential jobs.

What’s The Difference Between Commercial And Hotel Plumbing?

While the basic plumbing skills are the same, commercial plumbers must have a wider knowledge of building plans and designs to install complex water systems in multiple-story buildings such as hotels and apartments. They are also responsible for designing and installing water heating infrastructure, pipework, fire sprinklers, ventilation systems, and more.

Commercial plumbing serves a lot more people than residential systems, so the pipes are bigger and there are more sinks and toilets. Additionally, many businesses have to meet strict health codes, so they need different plumbing fixtures that can be easily cleaned and drained.

You will want a commercial plumber who is experienced in working on large-scale plumbing projects, adheres to the highest industry standards, and can quickly procure permits to complete jobs efficiently. Ask potential plumbers for references from previous clients and pay attention to their online reviews.

What’s The Difference Between Commercial And Healthcare Plumbing?

The plumbing systems in hospitals and other healthcare facilities are often more complex than those in commercial spaces like office buildings or restaurants. This is because these spaces need to comply with stringent healthcare regulations and must be easy to clean.

This type of work also involves more risk, which means that plumbers working in these spaces should have significant insurance and be bonded. They may also have to go through a bidding process to be chosen for the job.

Additionally, plumbers need to understand the unique requirements and maintenance issues that are associated with healthcare plumbing. This includes understanding the importance of proper hand hygiene and the need for disinfection of medical equipment. This is because bacteria can be transmitted through water and may cause illness in patients. This knowledge can help them design plumbing systems that meet these demands.

What’s The Difference Between Commercial And Education Plumbing?

Plumbing programs offer students a comprehensive education in the field and prepare them for future careers. They cover topics like pipe sizing, soldering and brazing, blueprint reading, water distribution systems, emergency repairs, and more. They also include apprenticeship programs that provide students with hands-on experience in real-world settings.

Commercial plumbing involves larger-scale installations and more complex regulations and codes than residential systems. It also requires a more thorough understanding of industrial-grade pipes and fixtures, as well as specialized knowledge for specific industries, such as restaurants or hospitals.

Additionally, commercial plumbing relies on preventative maintenance to avoid large-scale issues. This can lead to higher income potential for plumbers, as well as more consistent work opportunities. This is particularly true if the plumber is part of a union, which offers benefits such as negotiated rates and priority scheduling.

What’s The Difference Between Commercial And Agriculture Plumbing?

Commercial horticulture, indoor farming operations, and field growing operations all require specialized plumbing services. The experts can provide agricultural plumbing services for all facets of your operation. This includes consultation, design services for the new era of irrigation systems in both indoor and outdoor agriculture facilities, and more.

Commercial plumbing involves larger pipe diameters and higher water pressure systems than residential systems. It also requires specialized tools and equipment to handle. Commercial plumbing also typically connects to sewage systems, which means more issues can occur than with plumbing in private homes.

Commercial plumbing also places a greater emphasis on water efficiency and conservation. For example, commercial plumbing can include backflow prevention systems that keep polluted water from flowing back into the public water system. This can help reduce utility costs and protect the environment.

Natalie Wood

In life, Natalie Wood was one of Hollywood’s most alluring actresses. But in death, she remains a mystery.

Natalie Wood

Fresh scrapes and bruises on her body suggested that she may have been assaulted before she died, but the investigation was closed without any charges. Wagner, Walken and Davern’s accounts shifted over time and they have never fully clarified what happened that night.

In the early stages of her career, Wood was a popular child star. She appeared on the television shows The Pepsi-Cola Playhouse, Mayor of the Town, Four Star Playhouse, The Ford Television Theatre, and General Electric Theater. In the 1953-54 television season, she played Ann Morrison, the teenage daughter in the ABC situation comedy The Pride of the Family. She also had roles in the feature films The Silver Chalice and One Desire.

Wood successfully made the transition from child star to ingenue at age 16 with her role as the girlfriend of a troubled outsider in Rebel Without a Cause (1955). This film, Nicholas Ray’s groundbreaking depiction of teenage rebellion and angst, garnered her an Academy Award nomination. She followed this with a small, but crucial role in John Ford’s The Searchers (1956).

As an actress under contract to Warner Brothers, Wood often made movies she did not want to and was criticized for her bland performances. For example, she disliked her part as a white girl abducted and raised by Native Americans in The Searchers. She felt the script lacked depth and her performance was uninspired. Despite these missteps, she continued to receive positive reviews from critics for her work in films such as The Cracker Factory and the mini-series From Here to Eternity.

Although she had a number of hit films in the early part of her adulthood, Wood’s career seemed to stagnate after 1969’s social comedy Bob & Carol & Ted & Alice. She did not make any significant appearances in theatrical films in the ensuing years, and instead focused on her personal life. She married screenwriter Richard Gregson in 1972, had a daughter with him named Natasha, and then divorced him before marrying Wagner in 1974.

Her marriage to Robert Wagner

The old-fashioned studio system set Wood and Wagner up on a date in 1956, ostensibly to garner publicity for the star. They hit it off, and soon the couple were married. It was a happy marriage until he began to sulk in the face of less-than-stellar films. He eventually cheated on her, and she dumped him. She dated numerous men afterward, including singer Frank Sinatra and actor Henry Jaglom. She also had a brief dalliance with Elvis Presley, according to Bobbie Ann Mason’s book.

Wood starred in many of the most popular movies of the 1950s and 1960s, including a starring role alongside Maureen O’Hara in Christmas classic Miracle on 34th Street and as brooding James Dean’s love interest in Rebel Without a Cause. She was also a top star in the 1961 Broadway musical West Side Story, which she starred with Richard Beymer and Rita Moreno. Her career slowed down in the 1970s, but she continued to work and occasionally appeared on TV.

After Wood’s death, rumors swirled that Wagner was involved in her death. However, Gregson Wagner tells the documentary that her mother didn’t want to die and that she didn’t have a high enough blood-alcohol level to cause drowning. He claims that her dinghy was found nearby, and he believes that she may have fallen into the water while trying to secure it.

Not long after Wood’s death, Wagner moved on and started a relationship with Jill St. John, who he had known since they were both contract players at 20th Century Fox. The couple married in 1990. St. John was familiar with the pain of losing a spouse as she had lost her first husband, Lance Reventlow, in a plane crash in 1972.

Her roles in Splendor in the Grass (1961) and West Side Story (1961)

In 1955, when she was only 16 years old, Wood was cast in the role of Judy in the blockbuster film Rebel Without a Cause. This success set her on the path to a series of roles as the neglected daughter of other actors, including Fred MacMurray in Father Was a Fullback and Dear Brat, Margaret Sullavan in No Sad Songs for Me, and James Stewart in The Jackpot. During this period, she also appeared in several TV shows and made numerous television movies.

In 1961, she starred in West Side Story, directed by Jerome Robbins and Robert Wise. The film was a major box office and critical success, and it earned her an Oscar nomination for Best Actress. According to Tibbetts, this and the previous year’s Rebel Without a Cause were “modern allegories based on ‘Romeo and Juliet’ themes, including private restlessness and public alienation.”

While making the film, Wood had to perform a number of sexually explicit scenes, which were controversial for its time. The Production Code Administration, led by Geoffrey Shurlock, monitored the picture and forced Kazan to cut many of them. During one scene, Wood had to swim into a lake in the dark of night while wearing only her bathing suit. She was nervous about the sequence, and worried that she would drown. The director reassured her by getting into the water with her.

In 1962, Wood starred in the musical Gypsy, a role that brought her even more critical acclaim. She was praised for her performance as the headstrong stripper Gypsy Rose Lee, and she received a nomination for the Academy Award for Best Actress. She made her final appearance in the sex comedy Bob & Carol & Ted & Alice in 1969, and she acted only occasionally after that.

Her divorce from Robert Wagner

Wood was an Oscar-winning actress, a devoted family woman and a lively person who made everyone around her happy. She was America’s sweetheart thanks to her numerous gigs as a child actress and her lead role in the 1961 film West Side Story. But that doesn’t mean that her personal life was easy. She suffered through several divorces and rumored flings with male co-stars. But even though she had a rough start in her youth, she managed to find happiness later on.

She married twice during her lifetime and had two children with both of her husbands. Her first marriage to Robert Wagner lasted for seven years before the couple separated in 1962. Rumors had it that the reason behind the split was Wagner’s infidelity with his Splendor in the Grass costar Warren Beatty. But he denied the allegations. The following year, he remarried to actress Marion Marshall.

In a recently published book titled Fatal Voyage: The Mysterious Death of Natalie Wood, author Laura Finstad claims that Wood found Wagner in flagrante delicto with his butler David Cavendish at their Beverly Hills home. According to her sister Lana, the actress became hysterical and smashed a glass window before fleeing the scene in her nightgown.

Police investigated the incident, but the case was closed. The Los Angeles County Sheriff’s Department reopened the investigation in 2011 after receiving scores of tips. They labeled Wagner as a person of interest, but he denied any involvement in his wife’s death.

Wood was 43 when she died during a Thanksgiving weekend boat trip off the coast of California with her son from her second marriage, actor Christopher Walken and their friend, producer Richard Gregson. Her body was found floating in the ocean. The cause of her death was never determined but it was ruled an accident.

Her death

Groomed for stardom from birth by her ambitious mother, Maria, Natalie Wood died mysteriously in a drowning accident off the coast of Southern California in 1981. Her death remains a mystery to this day, and it’s likely that it will remain so.

Wood was filming the thriller Brainstorm during her final days when she died. She and co-star Christopher Walken, as well as the boat captain, had been drinking all night. The film’s director, Doug Trumbull, had to rewrite the ending of the movie, and a stand-in and sound-alikes were used in place of her for some scenes.

The four had dined at Doug’s Harbor Reef in Two Harbors and then returned to their yacht, named Splendour. According to the restaurant’s manager, Don Whiting, the group was very intoxicated at the time of Wood’s disappearance. He said he believed that Wagner and Walken had gotten into an argument. Ten to 15 minutes passed before Wagner called Harbor Patrol to report Wood missing. Her body was found the next morning about a mile from the yacht, with a small dinghy beached nearby.

There have been many theories about the cause of Wood’s death, but nothing has ever proven conclusive. In 2011, Los Angeles County sheriff’s officials reopened the investigation and changed the cause of death from accidental drowning to undetermined factors. The coroner also noted fresh bruises on Wood’s body, but the investigation was closed and no charges were ever filed. Wagner, now 91, has always denied any involvement in the actress’s death. He has not been interviewed by police for several years. The case is still classified as suspicious.

What Does a Plumber Do?

Plumbers In Stronsville Ohio install and repair pipes, fixtures, and appliances in residential and commercial settings. Their responsibilities include working from blueprints and building codes to design plumbing infrastructure and ensuring all components comply with applicable regulations.

Plumbers also have customer service duties, including listening to customers’ complaints and providing information about repairs. They may also need to work evenings and weekends or be on-call for emergency situations.

Plumbing systems are vital for providing water, waste removal, and temperature regulation in homes and businesses. Plumbers install and repair these systems to ensure they are functioning properly. They work with a variety of materials and are required to have excellent problem-solving skills. Plumbers must also be able to follow safety procedures and regulations.

The majority of plumbers receive their training through an apprenticeship, which combines classroom learning with on-the-job experience. Many programs last four to five years and include 2,000 hours of paid on-the-job training. You can also get your start in this career by completing a vocational program at a trade school. These programs typically take a year or two to complete and cover topics like local plumbing codes, blueprint reading, and basic plumbing techniques.

Plumbers must be competent at a wide range of tasks, from repairing and installing faucets to laying pipe and performing routine maintenance. They must also be able to work with tools, including power and hand tools, as well as various machinery. Plumbers often need to take measurements and read blueprints to understand how their projects will fit together. They also must be familiar with the proper use of gas and electrical systems in their work.

In addition to technical knowledge, plumbers need good communication skills. They must be able to listen to customers’ complaints and determine the best way to fix them. They may also need to explain complex problems in simple terms so that non-technical people can understand them.

Plumbing is a physically demanding job, and plumbers must have the strength and stamina to perform manual labor for extended periods of time. They also need to be able to work in tight spaces and lift heavy objects. Some plumbers belong to labor unions, which negotiate their wages and benefits.

Plumbers must also be competent at working with a variety of materials, from steel and copper to plastic and cast iron. They need to know how to solder and braze pipes and use different types of joints, such as push-fit, compression, threaded, and solvent weld joints. They must also be able to recognize and diagnose issues with plumbing fixtures, such as drains, toilets, showers, taps, and sinks.

Inspection and Diagnosis

A plumbing inspection allows a professional to evaluate the condition of the entire plumbing system. This can identify issues before they become problems and help you plan for future repairs or upgrades. The plumber will look at the overall quality of the pipes, inspecting their joints and connections for signs of leaks or corrosion. They will also evaluate how well drains and vents work to ensure proper water flow. They will check all appliances and fixtures for functionality and signs of wear or leaks, including the water heater. They may also test the water pressure to ensure it is at a safe level.

Leaks are a major concern because they can lead to expensive damage over time. The plumber will look for visible signs of leaks, such as damp areas or mold, and may use specialized tools to find hidden problems. They will assess the condition of all fixtures, including faucets, showerheads, toilets and other devices, for damage or unusual wear. They will check all drain lines for clogs or leaks and confirm they are properly sloped. They will also examine the water heater for age, performance and venting, as well as inspecting all gas lines for leaks or rust.

If they notice any potential hazards, the plumber will recommend solutions. This could include repairing or replacing damaged parts, installing new fixtures or upgrading older ones to reduce water consumption or promote sustainability. The plumber will provide a detailed report on their findings, including costs for any recommended repairs or replacements.

An experienced plumber can navigate a complex plumbing system faster than a DIYer, saving you valuable time and money. They will also have the skills and specialized equipment needed to get into hard-to-reach spaces like behind walls or under the floor. A professional inspection can also uncover hidden issues like corroded pipes that need replacing, allowing you to make informed choices about your home improvement projects. Plumbers will also recommend routine maintenance tasks that you can perform to keep your plumbing in good condition, such as cleaning drains, flushing the water heater or replacing water filters.

Customer Service

As plumbers, your job is to help customers with all types of plumbing issues. Whether it’s a dripping faucet or an overflowing toilet, a customer needs to know they can trust you to be there when they need you most. That’s why it is essential to provide excellent customer service to keep your customers happy and loyal.

When a customer calls a plumbing company, they want to know they can speak with someone immediately and get all their questions answered quickly. They also need to know they can trust the plumber they choose will show up on time and do a good job. In order to provide superior customer service, you need to have a team of trained professionals to answer the phone and address all customer concerns. By partnering with a contractor call answering service, you can focus on your work while ensuring all customer calls are being addressed in the best possible way.

Customer satisfaction is essential for plumbers because it leads to repeat business and referrals. But delivering exceptional customer service is not always easy, especially when you’re dealing with emergency situations in people’s homes.

One of the best ways to ensure your plumbers are providing top-notch customer service is to use a field management software that allows you to capture and monitor all customer feedback, including reviews and surveys. You can then analyze this data and identify trends to improve your customer service.

When looking for a plumber, consumers often turn to online review sites like Angie’s List to find the best local options. These reviews are based on real experience from real customers and can be a valuable resource to help make the right choice. So when you’re hiring a plumber for your next project, take the time to read through these reviews and be sure to consider how the service was during each visit.

If you’re not already using a plumbing call scheduling software, you should be! The right tools can help you reduce wait times, dispatch plumbers faster and schedule appointments online. Plus, GPS tracking keeps your plumbers on track and gives you peace of mind knowing they’re arriving on time.

Collaboration with Other Professionals

Plumbing is a highly technical trade that requires specialized knowledge and skills. Plumbers often work with other professionals, including electricians and builders, to complete a project or solve an issue. They also collaborate with customers, providing them with advice on water conservation and best practices for maintaining their plumbing systems.

Plumbers install and repair pipes, faucets, toilets, bathtubs, showers, sinks, and other fixtures in homes and businesses. They may also work on gas lines and other components of heating and cooling systems. They use a variety of tools and materials, including hand and power tools, soldering guns, power drills, and digital leak detection devices. Plumbers must be familiar with local building codes and regulations.

In new construction projects, they work from blueprints and architectural plans to design the plumbing infrastructure. They are responsible for ensuring that the pipe lengths, valve locations, and drainage capacities meet code requirements. They also connect kitchen and bathroom appliances, such as dishwashers and washing machines. Plumbers are frequently called on to troubleshoot issues with existing plumbing systems, such as leaking pipes, clogged drains, or malfunctioning water heaters. They must be able to identify the source of the problem and suggest effective solutions.

Because they deal with contaminated water and sewage, plumbers must take precautions to avoid exposure to infectious diseases. They wear gloves and masks when handling pipes, fixtures, and other equipment and take steps to disinfect their workspace after each job. They are also required to take regular health and safety training.

Many plumbers learn their trade through an apprenticeship, which combines classroom instruction with paid on-the-job training. A high school diploma is usually required to be admitted into an apprenticeship program, and students who are interested in becoming plumbers should contact local trade schools or unions for information about programs in their area. Once a plumber has completed their apprenticeship, they must pass a state certification exam to become a journeyman plumber.

Why It’s Important to Inspect Your Dock Before It’s Too Late

Since docks are exposed to the elements, they are susceptible to several problems like cracking, rusting, rotting, and more. A dock should be inspected for damage and professionally repaired before it becomes unsafe.

Dock Repair

It is usual for a dock to have a little bit of rot, but if the damage is spread throughout the entire structure, it is time for a replacement.

As docks sit on the water, they are constantly subjected to powerful wave and current action. This can cause bending, warping and even cracking. In some cases, these issues can be repaired, but in others it may be time to consider replacing the entire structure. This is especially true when it comes to a metal or steel dock, as they are more susceptible to damage than wood-based ones.

Small cracks in the surface of a dock are not a big deal and can probably be repaired fairly easily. However, if the structure is showing signs of significant bending or warping it will be more cost-effective to replace the whole dock than it would be to try and fix just the problem areas.

Another important sign that a dock is reaching the end of its life is any signs of mold, slime or algae. These can be very dangerous for people who use the dock and should be removed as quickly as possible to prevent health hazards. It’s also a good idea to remove any items from the dock before winter to protect them from freezing and thawing, which can lead to additional damage to the dock.

Loose boards are also a sign that a dock is in need of repair. These can be dangerous for anyone using the dock, as they might trip or fall through a hole. It’s usually better to simply replace these boards than to attempt to fix them, as the deterioration will continue and could potentially result in a collapsed dock.

Rust spots are another common problem with docks. This is a natural occurrence with any dock that is exposed to the elements, and it can be difficult to avoid. However, rust spots that are taking over a major portion of a dock are an indication that it’s time to consider replacement, as the structure may no longer be structurally sound.

Floating docks are also more susceptible to rust than permanent docks, as they have more metal parts. It’s important to regularly inspect these docks for any rust or corrosion and have any metal parts that are rusted replaced right away to avoid serious problems in the future. It’s also a good idea for these dock owners to consider a marine-grade coating to help keep rust from developing in the future.

Wood Rot

Wood rot is one of the most serious problems that can affect both floating and fixed docks. It happens when moisture soaks into the wood, weakening its structure and making it more prone to decay. The best way to protect against this is by coating the wood with waterproof paint. You should also keep the area free of organic growth like moss, mildew and algae, as these can trap moisture within the wooden structures.

A rotting dock isn’t just unsightly, it can be extremely dangerous as well. If the structure collapses while someone is using it, they could be seriously injured or killed. This is why it’s essential to inspect and maintain your dock regularly. A regular inspection will ensure that all areas are safe to use and any deterioration is addressed as soon as possible.

During a routine dock inspection, be sure to check for signs of damage, such as cracks and warps in the pilings, rust on metal parts or supports, and splinters in the boards. In addition, a thorough cleaning will help you identify areas that need repair or staining. Always remember to sand the board before applying stain; otherwise, it will chip off faster. Staining with a marine-friendly product will also protect the structure from UV damage.

The sun’s rays can cause a number of issues for your dock, including fading of the boards and deterioration of the wood. This process is known as photo-oxidation and it can be mitigated by keeping your dock free of organic growth, sealing it with a good marine-grade stain, and regularly sanding and re-staining.

A deteriorating dock can also be vulnerable to fungus. If you see fungus in multiple areas of your dock, it’s time to consider replacement. Fortunately, replacing the affected sections of your dock can be relatively inexpensive.

Inspect your dock regularly for signs of damage, especially following severe weather events. Routine inspections will catch most problems before they become a major issue. By addressing these issues quickly, you’ll be able to enjoy your dock for as long as you own it.

Rust

As an essential piece of equipment for waterfront property owners, docks are exposed to a lot of water, sun and changing weather. These factors can take their toll, causing damage that requires professional repair and replacing. A dock that’s in serious need of a replacement could be putting your family and guests at risk and can even become unsafe to use.

If your dock is showing signs of major problems like rot, cracking and rust, it might be time to consider having it replaced entirely. A new dock may cost more than repairing and maintaining an old one, but it will save you money in the long run by cutting down on costly repairs and maintenance.

Even with the best care and treatment, wood that constantly comes in contact with water will eventually show rot and other damages that require professional repairs. Likewise, metal components on your dock are susceptible to rusting due to the constant exposure to water and salt air. This is an especially dangerous situation since rusting metal can weaken or break parts of your dock and compromise their structural integrity.

Regular inspections of your dock should include looking for rotting areas and rust stains. Inspecting your dock regularly also makes it easier to spot and address these issues before they become a big problem. Keeping your dock clean is also important, and a great way to do that is by using a pressure washer to get rid of any dirt or debris that has accumulated on your deck. Always be careful when doing this, though, since the high-pressure spray of a pressure washer can chip and splinter wood.

When it comes to rust, the simplest solution is to paint over any affected metal surfaces with a coat of industrial enamel in the color of your choice. Whether you choose silver, safety yellow or something else entirely, this will keep your dock’s metal looking bright and fresh. For more difficult rust stains, you can try a mix of baking soda paste and vinegar for a safe and effective home remedy that will not damage your dock’s materials.

Leaning or Sinking

As the summer season approaches it is important to stay on top of any small repairs that could turn into big problems down the line. If you see any damage or wear and tear on your dock, it is crucial that you have it repaired before peak season arrives so you can enjoy all the fun and sun the lake has to offer without worrying about your safety.

Boat docks must endure a lot of pressure on a daily basis, especially as boats come in and out. Over time this can lead to the structure leaning or even sinking in certain areas. If this happens, it is time to hire a professional to re-float the dock and have it anchored down properly.

Another common problem is cracks and warps in the foundation of the dock. Wood is not very good in water and over time it will rot, which can weaken the whole foundation of the dock. This is especially true if the rot occurs in the load-bearing supports. These may need to be replaced, depending on the extent of the damage.

It is also important to check on auxiliary structures like cables and ropes. These hold a lot of weight and if they snap while loading or unloading a boat, it can cause serious injuries to people. It is best to oil these structures regularly and perform seasonal maintenance to make them last longer.

Finally, you should also pay attention to the electrical wiring of your dock. It is very easy for the wires to get submerged in the water, which can pose a major safety risk. If you notice any exposed or corroded electrical wiring, it is time to get in touch with a professional electrician and have them set up a new system.

Keeping your dock in top shape is one of the most important things you can do for yourself and your guests. Whether you are bringing in your own boat or visiting friends, you want to be sure that the dock is safe and secure so you can relax and enjoy the company of others.

Landscape Lighting Ideas to Elevate Your Home’s Curb Appeal

Landscape lighting can bring added safety, security and curb appeal to your home. But, like anything else, it needs regular maintenance to stay in top condition.

Walkway lights shine light on pathways and walkways to prevent tripping hazards at night. They can also showcase your favorite plants or even your home’s architecture. For more information, click the link https://landscapelightingorlando.net/ provided to proceed.

Ambiance

The right landscape lighting can set the mood for any occasion. It’s the perfect way to highlight special features, such as fountains and ponds, flower gardens, patios, pergolas and your favorite trees. It can also be used to draw attention to your home’s architectural details and increase its curb appeal.

Whether you’re hosting a romantic dinner for two or an epic party for all of your friends, the right landscape lighting creates an inviting atmosphere. Choosing the right fixture for your space can help you achieve your desired effect, but it can be difficult to know where to start.

A good place to start is by familiarizing yourself with the different types of landscape lights available. There are several main categories: spotlights, path lights and specialty lights. Spotlights come in a variety of beam widths and wattages, making them versatile enough to be used for almost any landscape application. They can be used for highlighting, silhouetting, shadowing and grazing.

Path lights, on the other hand, are great for illuminating pathways or areas that are hard to light with other fixtures. They typically have a low-wattage and a small footprint, which makes them ideal for illuminating smaller spaces. The best path lights have a durable construction that can withstand the elements, so they don’t rust or chip over time.

Another type of landscape light is a floodlight, which is perfect for larger areas that need to be illuminated evenly. It uses a wide beam of light that “washes” the area with illumination, and can be used to accentuate large walls or areas where people gather.

Finally, specialty lights are designed for specific tasks, such as illuminating a mailbox or a deck railing. They can be installed in areas where other types of lights wouldn’t work and are available in a variety of styles and finishes to complement any décor.

Landscape lighting is a great way to add a unique element to your home, and it increases your property’s value and safety. With so many different options available, it’s important to choose the right light for your space and plan out a layout before you start installing. Once you have the basics down, you can focus on creating a design that’s both functional and visually appealing.

Safety

When it comes to landscape lighting, safety is important. Properly positioned lights help people find their way on your property after dark, making it safer to walk around. They can also discourage criminal activity by making it harder for perpetrators to hide or blend in with surrounding darkness.

There are many different types of landscape lighting, each with its own unique purpose. For example, uplighting is used to highlight tall structures such as trees or bushes. It’s also great for defining the shape of features like fountains or ponds. Path lights are a practical choice for lighting walkways or stairs, while spotlights are ideal for illuminating focal points in a garden or backyard. Specialty lights, such as tiki torches or bistro lights, can add a decorative flair to your outdoor spaces while serving a functional purpose.

A well-lit property will be more inviting to guests and deter burglars. But you can’t forget that a well-lit property is safer for the homeowners as well. A properly lighted walkway can prevent that awkward juggling act when you’re trying to grab your keys in the dark and open the front door. And having lights near your driveway can make it easier to see parked cars or approaching people.

It’s best to leave the installation of landscape lighting to a professional. Not only is it a complex process, but improperly buried wiring can cause serious issues. And if you opt for solar lighting, it’s crucial to have an experienced installer as these systems are highly susceptible to weather damage.

A reputable lighting company will have a team of trained professionals who can assess your property and create an efficient plan for installing landscape lighting. They will determine the wattage of your fixtures to avoid overloading a transformer and can even install a photocell or timer for energy savings. They will also test the lights at night to ensure they are arranged correctly and creating the desired effect. And they will use durable, long-lasting materials such as copper and solid brass rather than cheaper aluminum, which can corrode over time.

Security

While beauty is a major concern of landscape lighting, it’s important to remember that safety and security are also key benefits. A well-lit property makes it less attractive to burglars and other criminals by minimizing hiding spots. Additionally, it enhances personal safety by illuminating accident-prone areas like stairs and paths. With proper landscape lighting, family members and guests will be able to navigate their outdoor space safely.

A poorly lit yard can be a dangerous place, especially at night. Not only can it be difficult to see, but dark nooks and crannies can serve as hiding places for prowlers. Strategically placed landscape lights can eliminate these hazards and help to deter crime by making it more difficult for potential intruders to find entry points to your home.

Landscape lighting can also serve as a visual deterrent by making your house more visible to passersby. In addition, a well-lit home is more likely to be occupied and is more of a deterrent to intruders than a vacant house. Furthermore, by highlighting features of your landscape with lights, you can create the impression that your home is well-maintained, which can further discourage break-ins.

Keep in mind that landscape lighting is exposed to the elements, so it can become damaged or ruined by rain and snowfall. However, the good news is that most lights are waterproof and can withstand heavy rainfall. If your lighting is impacted by weather, you can always call a professional to fix the problem.

Another thing to consider is that a landscape lighting installation involves hardwiring, which can be risky. It’s best to leave this project to a professional because improperly buried or connected wiring can lead to fires and other electrical issues. Additionally, if you try to do the work yourself, you may run into obstacles such as concrete or tree roots that prevent you from getting your desired results.

If you are interested in landscape lighting for your home, make sure to contact a reputable company. They will have the expertise to ensure your project is done right, ensuring the safety of your family and pets while providing you with a beautiful, well-lit backyard.

Curb appeal

Unlike daytime curb appeal, which is a mix of many factors — the landscaping, paint color, front door and more — landscape lighting has a unique ability to elevate your home’s curb appeal after dark. This is because of the way it enhances your outdoor space and makes your house look welcoming to guests and passersby. The best landscape lighting ideas can also make your home stand out in the neighborhood and increase its value if you ever decide to put it on the market.

Besides enhancing your home’s security and safety, good landscape lighting can also improve your home’s curb appeal by illuminating pathways, stairs and other areas of the yard. Illuminating walkways can prevent your family members and visitors from tripping over low-hanging branches or getting lost in the dark. In addition, well-illuminated areas can make your yard look more inviting and deter burglars.

You can illuminate a staircase or pathway by using path lights. These lights are similar to post lights but smaller in size. They can be placed in the middle of a walkway or path to guide people. Alternatively, you can use motion-detecting lights to automatically light up the area when someone is approaching. However, you should be careful to place your lights properly to avoid the risk of tripping or overcrowding.

To get the most out of your landscape lighting, you need to know the basics. This includes understanding how different types of lights are used to highlight features and create a balanced effect. Different lighting techniques include highlighting, silhouetting, shadowing, moonlighting and grazing. In addition, you should consider the color temperature of your lights — warmer colors create a cozy feeling and cooler tones help ensure visibility.

You should also make sure to plan your wiring run, taking into account the distances between each fixture. This will save you time and money during the installation process. Also, remember to routinely clean your fixtures and replace burnt-out bulbs. These maintenance practices will keep your lighting system looking great and improve its performance. The right landscape lighting can transform your backyard into a dramatic showcase that highlights your home’s architectural beauty and makes it feel welcoming at night. With the right plan and a bit of patience, you can achieve the curb appeal you’ve always wanted.

Tips And Tricks For DIY Ceiling Repair Common Issues

When a home experiences damage to its ceiling, it can quickly escalate into a serious project. Whether the damage comes in the form of cracks, water spots, or sagging, it’s important to identify and address these issues before they become more problematic.

Unlike walls, ceilings are more complicated to work with and require more experience when it comes to repair. Read on for tips and tricks to help you get your Ceilings Perth job done right.

ceiling repair

Drywall Cracks

Most homeowners experience ceiling cracks at some point, but they don’t have to be a sign of more serious structural issues. Instead, they can be a simple cosmetic problem that can be easily repaired with some joint compound or spackle. When a crack appears in your ceiling, you’ll want to take the time to thoroughly clean up the area and prepare it for repair.

To begin, clear the space around your ceiling to provide unobstructed access and allow you to move furniture or decorative items out of the way. This will help protect your belongings from paint and drywall dust, and it’ll also make cleanup much easier. Next, lay down a piece of plastic or a tarp in the area where you’ll be working to catch loose debris and paint drops. Finally, set up a ladder that can hold your weight, such as an A-frame ladder.

Drywall cracks most often appear where two pieces of drywall meet at an outside wall corner, or in the top-center or bottom-center of the ceiling. They can be caused by house settling, changes in humidity or temperature, or poor workmanship. Most cracks will be a few inches wide, but some may even be quite long.

Fortunately, most of these cracks are relatively easy to fix with mesh or paper tape and mud. The purpose of this method is to prevent future cracks by transferring the stress to the tape, rather than the drywall.

If you have a ceiling crack that isn’t near a corner, apply a strip of mesh tape to the entire surface and then cover it with a layer of joint compound. Then, using a trowel with light pressure, skim the compound with a skip texture to fill in the crack. If you do this right, the cracked area will not be visible once it dries. Once it dries, you can sand the patched area to smooth it and then paint over it. A good quality drywall primer and paint will also help to disguise the repair. You can find these products at most home improvement stores and online.

Holes

Ceiling holes are a common problem that can occur from many things, including leaks, lighting or fixture damage, or simply age and wear. Regardless of the cause, repairing these gaps is important because they can leave interior areas of your home exposed to other types of damage such as wood rot. In addition, the gap will allow water to seep in through the ceiling and can cause mold and mildew.

When a wet patch appears on the ceiling, it is important to determine the origin of the moisture as it isn’t always immediately apparent. The location of the spot and other factors such as the season will help you narrow down the source of the leak. Once the cause of the wet patch is determined, you can address it and prevent future issues.

While it may be tempting to attempt DIY ceiling repair, this type of work is not for the faint of heart. It requires a significant amount of physical labor and the use of specialized tools for each task. Plus, if you don’t have the right skills or know-how, you could end up making the issue worse. If you do decide to take on the challenge, there are a few tips and tricks that can help you complete the project more successfully.

First, make sure to prep the area by clearing it of any debris and ensuring there is enough room to work. You should also wear protective gear, such as a mask and safety goggles, for your safety. Safety goggles that fully wrap around your eyes are preferable to those with open sides as they will provide more coverage from dust and other materials that may fall on you as you work.

Once the area is cleaned, a primer should be applied to the surface of the ceiling to prepare it for a new coat of paint. Then, it is a good idea to sand the surface to smooth any bumps or uneven areas. Finally, a finish coat should be applied. This will protect the repaired surface and add a fresh, appealing look to your ceiling.

Water Damage

If you spot water damage on your ceiling, it’s important to act immediately. The longer a ceiling absorbs moisture, the more likely it is to affect its structural integrity, threaten your safety, or foster microbial growth. If you’re able to determine the source of the water damage—it may be a roof leak, a faulty plumbing fixture, or condensation—it’s possible that you can fix the problem yourself.

However, if you’re seeing a pattern of water spots or smell a musty odor in your home, there is likely a serious issue with the ceiling structure itself. In this case, it’s best to bring in a professional to prevent further damage to the ceiling and potential health problems for your family.

Depending on the severity of the water damage and how long it went unnoticed, fixing your ceiling may involve anything from a simple touch-up with Spackle and paint to replacing or repainting the entire area. It’s also important to dry the affected area thoroughly before beginning any repair work. Drywall holds water surprisingly well, so it may take days or even weeks for your ceiling to be fully dry. To speed up the process, consider renting high-powered fans and using dehumidifiers to help get the job done faster.

In some cases, the water damage on your ceiling may have caused mold to form. If you notice any signs of mold in your home—including a musty odor or yellow, green, or brown spots on the ceiling—it’s imperative to act as soon as possible. Mold can cause a wide range of health issues, including rashes, dizziness, headaches, and asthma attacks.

To address the mold, use a dehumidifier to remove any moisture, then clean the surface with a damp cloth and mild dishwashing detergent. Next, apply a coat of joint compound to the affected area, then add a layer of drywall tape, followed by another coat of joint compound and a final coating of joint tape. Once the area is completely dry, you can begin painting once again. A primer with a stain blocker will help prevent future water stains or mold from appearing on your ceiling.

Structural Issues

Ceilings are often overlooked, but they’re important parts of any room that should be kept in good condition. Regular cleaning, repainting, and ensuring that pipes are well-ventilated can help keep ceilings strong and problem-free. However, if you do notice cracks, stains, or other issues, it’s best to call a professional repairman right away. A professional can handle a range of ceiling issues, including water damage, leaks, and sagging.

The cost of ceiling repairs will vary based on the type of issue and materials needed to fix it. For example, a small crack that doesn’t affect the structure of a home or building might be easy to repair with a DIY kit that costs between $10 and $30. But larger cracks, sagging, or any discoloration could indicate a more serious problem that needs to be addressed immediately.

Leaks are one of the most common problems that homeowners run into with their ceilings. Depending on the severity, a leak can cause major structural damage that requires significant replacement or repair work. If you suspect that you leak your ceiling, you should shut off your water supply and contact a repair specialist as soon as possible.

If your ceiling is sagging, it’s likely due to moisture and water damage. It may be a sign that the drywall tape has failed, or it might be caused by a roof leak or other water damage in your home. To resolve the issue, you’ll need to dry the area, remove any stains, and repaint the ceiling. Before you repaint, it’s a good idea to apply a stain-blocking primer.

It’s usually best to leave complex and expensive ceiling repairs to professionals, especially if they involve structural materials like beams or plumbing. They have the knowledge, tools, and experience to make repairs quickly and effectively without compromising quality. Professionals also understand the nuances of different ceiling types, textures, and finishes, which is critical for an undetectable restoration. They can spot any underlying issues and address them promptly to prevent further problems and save you money in the long run.

Choosing a Grease Trap for Your Restaurant

Grease Trap Perth (or interceptor) is a kitchen wastewater receptacle that reduces FOG material that drains to the sewer system. Grease traps are required by municipal codes for restaurants and other food service establishments.

The size and location of a restaurant determines what type of grease interceptor it needs. FOG can build up in a clogged grease trap and lead to blockages that require costly repairs.

Grease traps are holding tanks that separate FOG (fats, oils and grease) from the wastewater that enters kitchen drains from sinks, floor drains and dishwashers. The wastewater then exits through an outlet pipe into the city sewer system.

As the wastewater flows into the grease trap, it slows down, allowing the less dense FOG materials to rise to the top while the solid waste settles at the bottom of the trap. This process is accomplished using gravity, baffles and a series of chambers in the grease trap’s design. The more dense water eventually exits the outlet pipe into the sewer system.

Because FOG accumulation is a major contributor to sewage blockages in cities, a growing number of municipalities are mandating that restaurants implement effective FOG management strategies. These include implementing grease traps and having them regularly cleaned and monitored.

A basic manual or passive grease trap uses a series of chambers and gravity to separate FOG from wastewater. As the wastewater enters the trap, it slows down, causing the less dense grease and oils to rise to the top while the solids settle at the bottom of the trap. The cleaner wastewater then exits through an outlet pipe into a nearby sewer system.

Passive grease traps are available in a variety of sizes to accommodate various FOG outputs and are relatively inexpensive to purchase and operate. They do, however, require regular manual cleaning and monitoring to ensure that they remain operational and compliant with regulatory requirements.

An automatic grease interceptor, also known as an AGRU (automatic grease removal unit), works on similar principles to a passive trap but eliminates the need for manual cleaning and monitoring. An AGRU system re-heats and skims FOG on a programmed schedule, transferring it to a collector bin for disposal. This type of grease interceptor is typically more expensive than a passive trap but can have significantly lower operating and maintenance costs over the long term.

Regardless of the type of grease trap you choose, it is essential that you never pour cooking oil or grease directly down any drain or sink. This can cause them to solidify as they travel through pipes, leading to clogs and overflows that damage your plumbing and can impact the city sewer system.

Fats, oils and grease (FOG) that enter a restaurant’s wastewater system can clog plumbing, causing backups or even overflows into local city sewage systems. This is why it’s crucial to have a properly functioning grease interceptor, as a failure to do so can result in fines for the business.

Grease traps work by slowing the flow of wastewater, allowing it to cool and separate into 3 layers; FOG, solids, and clear water. Animal fats and vegetable oils are much less dense than water, so they float to the top of the grease trap while solids sink. The FOG is collected in the grease trap’s “grease mat” while clear water exits through the outlet.

Traditional passive traps are large in-ground tanks made of concrete, fiberglass or steel with a capacity of 500-2,000 US gallons (2,000-8,000 L). They are commonly called gravity interceptors. The rotting brown grease inside the tank must be pumped out on a scheduled basis and sent to landfills. A biological grease remediation treatment system is an alternative to a traditional passive trap. It utilizes a non-pathogenic strain of bacteria and odor control chemicals that eat the suspended fats, oils and grease in the interceptor.

While both types of grease traps are effective at preventing FOG from entering city sewer lines, the key to success lies in proper maintenance. Regular inspections by a qualified service provider, like DAR PRO Solutions, can ensure that the grease trap remains in good working condition and helps prevent costly clogs and backups.

Automatic systems, also known as AGRU’s (automatic grease removal units), use the same principals as passive traps but eliminate the need for manual pumping and monitoring. These units re-heat and skim the FOG on a programmed schedule and transfer the skimmed grease into a collector bin for easy removal and recycling. These units are available in a variety of sizes to meet varying needs and offer lower long term running and maintenance costs than traditional passive traps. In addition to the obvious practical advantages, these units are better equipped to keep FOG levels low in the sewer system, preventing them from contributing to fatbergs and sanitary sewer overflows.

When it comes to choosing a grease trap for your restaurant, you need one that will be able to keep up with your kitchen’s FOG production and avoid overflows. For this reason, many experts recommend selecting a model with a maximum capacity of about 500 gallons. It should also be easy to clean and have a removable filter basket. The best grease traps are made of non-corrosive materials, such as polyethylene or fiberglass. In addition, they should be equipped with a built-in grease monitor to help keep grease levels under control.

There is no single rule of thumb for determining how often you should clean your grease trap, as it depends on kitchen size and type. However, a few key tips for preventing an overfull grease trap include limiting solid food waste, rinsing greasy dishes with cold water, and using biodegradable dishwashing detergents. A proactive maintenance plan can also help you avoid overflows and keep your restaurant in compliance with local grease ordinances.

Grease interceptors and grease traps are designed to separate fats, oils, and greases (FOG) from other kitchen liquids like water and food scraps. The best designs take advantage of the natural tendency of these oils and fats to rise while other food waste sinks. They have a tube that dips below the surface of the water to pull out liquid FOG and separate it from other sludge and food waste.

Unfortunately, even the best grease traps can get clogged. This can lead to costly repairs and downtime. Fortunately, there are ways to avoid these problems, including training your staff on the causes of grease trap clogs and how to prevent them.

Aside from regular cleaning, the most important thing to do to reduce the risk of a grease trap clog is to use an effective FOG control product. A product like BioOne is an all-natural, food-safe product that is specially formulated to degrade FOG in your grease trap or pit. This process liquefies the FOG and transforms it into water and carbon dioxide that can flow freely through your sewer line.

The size and type of grease interceptor you choose will determine the upfront cost. However, installing a grease interceptor will reduce the amount of grease that enters your sewer system, which saves you money on maintenance costs and prevents costly pipe repairs down the road. Thermaco offers several different grease interceptors to meet your specific needs and budget, from small passive systems to large hydro-mechanical units.

In addition, the installation location of a grease trap will influence your overall costs. Ideally, you should install the grease interceptor as close to your kitchen’s drains as possible. This will minimize the distance that the FOG has to travel, allowing the grease to cool more quickly and separate from the wastewater.

Another factor to consider when determining the cost of a grease interceptor is the frequency of pumping and cleaning services needed. If a grease interceptor is not pumped at the correct frequency, it will become overloaded with FOG waste and unable to function properly. This will result in a reduced flow capacity, clogged inlets and outlets, and frequent odors.

If you are considering a hydro-mechanical grease interceptor, you will also want to consider the GPM rating of the unit. This will affect how much wastewater it can handle, which in turn will influence how often the trap will need to be emptied and cleaned.

Grease interceptors should be drained and pumped on a regular basis to ensure that they are operating efficiently, meet government regulations, and protect sewer lines and septic systems from fats, oils, and grease (FOGS) buildup. By keeping a schedule for regular pumping and cleaning, you can prevent costly and time-consuming blockages in your plumbing system.

By taking the time to understand what a grease interceptor is, how it works, and the different types of grease interceptors available on the market, you can make an informed decision that will be the best fit for your food service establishment. By choosing the right interceptor, you will not have to worry about overflows or surprise expenses and can focus your attention on creating a great customer experience.

Roofing Maintenance

Owning a home requires ongoing maintenance, from yard work to changing A/C filters. One of the most important tasks is roofing maintenance.

Roofing

Regular roof inspections at Red Stick Roofing Of Louisiana can catch problems before they escalate. From discoloration indicating a potential leak to excessive granules in the gutter, addressing minor issues prevents extensive damage and expensive repair costs down the road.

The flashing is a layer of protective metal that keeps moisture and air from penetrating into the roof system. It is used around the perimeter of the roof and around any penetrations such as vent pipes or water heaters. The flashing is typically made of aluminum, but it can also be lead or galvanized steel. It is important to check the flashing regularly for cracks, rust and gaps that can allow moisture in. Most flashing is caulked to provide an additional layer of protection, and it is important to check the caulk for peeling or other signs of degrading.

If the roof is steep, it is difficult to safely walk around and inspect the flashing. It is therefore important to have a ladder that can be positioned at the correct position to allow for a complete inspection. It is also a good idea to have the ladder secured to prevent it from falling, especially when walking near the edge of the roof.

When checking the flashing, pay special attention to the areas where it meets the wall and other structures such as a chimney or skylight. These areas are particularly susceptible to leaks and can be easy to miss if not looked at carefully.

Also, look for any shingles that are missing, especially near the flashing. If enough moisture is allowed past the flashing, it can cause extensive damage that may require a roof replacement.

In addition to rust, the flashing should be checked for areas of corrosion or other signs that it has become brittle and is in need of replacement. Corrosion can cause the flashing to weaken, which in turn can lead to leaks and other problems. It is a good idea to replace the flashing when replacing the shingles, so that the new roofing materials are matched with the appropriate flashing material.

Other signs that flashing is in need of replacement include areas where the roof is leaking and water stains on the walls inside the home. Leaks from flashing in these areas can be hard to identify and often masquerade as paint or window failures, but they are the source of moisture that can damage the structure and interior furnishings.

Trim Tree Branches

As stormy weather approaches, it’s important to regularly trim tree branches near your roof. This will protect your home from debris and reduce the risk of a falling branch during a strong storm. However, if you’re not sure where to start or don’t have the right equipment, hiring a professional is a great option. They have the knowledge and experience to safely maintain your property’s trees.

While a single bad pruning cut won’t kill your tree, multiple mistakes can make it vulnerable and weak. When trimming a tree, be sure to follow these tips:

Locate the branch collar. It’s a slightly raised area of rough bark where the branch connects to the main stem or trunk of the tree. If you cut too close to or remove the branch collar, it won’t be able to properly heal and could become infested with decay fungi. Always make the first cut on the underside of the limb to prevent damage to the branch collar. This will help to keep the weight of the limb off the branch collar and allow it to form a healthy callus.

When you’re ready to make the final cut, travel about 12-18 inches up the underside of the stub and make another cut. This will be about halfway through the stub of the branch and about 2-3 inches from where it connects to the parent branch. This location is the best spot to prevent damage to the stub and allow it to properly heal.

Never leave a stub on a removed branch. Stubs prevent the formation of a healthy callus, which allows moisture and insects to enter the wound. Also, stubs provide an entry point for disease organisms, which can degrade the health of your tree.

Thinning cuts (pruning branches back to their points of origin or attachment) reduce a tree’s overall size and encourage growth throughout the canopy. This can improve air circulation and sunlight penetration in the interior of the tree and on the ground below. To achieve this, use the “drop crotch” technique: Select and prune higher branches back to laterals that are one-third the diameter of the limb being removed. This will reduce the size of the limbs and allow them to retain their natural shape.

Inspect the Attic or Crawl Space

During a roofing inspection, home inspectors go into attics and crawl spaces to check for moisture and insulation problems. This is often done in conjunction with a radon test.

Leaking Roofs

If shingles are damaged or missing, water can easily seep through to the attic or crawl space. This creates a perfect environment for mold, mildew and wood rot. This can also cause damage to electrical wiring. The attic or crawl space is also the perfect place for rodents to hide and chew through wires, insulation, pipes and other materials.

In a home with a crawl space, the inspector will check for any access openings between units in a multi-family dwelling. Access to other homes through crawl spaces is not ideal and should be closed off. This will reduce the risk of insects and other pests entering the living areas through crawl spaces.

A home inspector will also look at the insulation in the attic or crawl space, checking for any signs of mold, mildew and rot. In addition, they will verify that the attic has adequate ventilation, which is important to help prevent excessive heat and humidity from building up in the living areas of a house.

Leaks will also be spotted during an attic or crawl space inspection. The best time to look for leaks is on a rainy day, as this will make it easier to spot them. Leaks are most likely to occur around attic vents, bathroom and dryer vents, kitchen hood exhausts, air handler exhausts and electrical service mast entry points.

Another thing that home inspectors will look for during attic or crawl space inspections is evidence of rodent infestations. This is a common problem in these tight, enclosed spaces. Rats, possums and other critters love to live in attics or crawl spaces and will gnaw through insulation and wood supports. The resulting holes in the wood and drywall can allow contaminated air to enter living areas, and electrical wires may become exposed.

Other items to check for during attic or crawl space inspections include the condition of trusses and rafters. They should be solid and not sagging or showing signs of rot. Home inspectors will also look for spliced wires that are not in covered junction boxes, as this can be a fire hazard.

Inspect the Gutters

Gutters are designed to direct runoff away from the roof and to prevent rainwater from accumulating in the yard, walkways and driveway. Gutters are also integral in protecting the roof, siding, fascia and foundation from water damage. However, they can only do this if they are working properly. Therefore, it is important that you regularly inspect your gutters to make sure they are clean and performing their intended functions.

Gutter inspections are most effective when conducted from the ground, rather than standing on a ladder. From this position, you can assess the gutters’ slope and consistency and spot water stains that may indicate a leak. You can also check for any gaps or signs of loosening along the seams and end caps. If you do notice any leaks, it is likely that the sealant has worn off and must be stripped and replaced.

In addition to checking for leaks and other problems, you should also ensure that the gutters are free of debris. If leaves and other debris are left in the gutters, it can block the flow of water and lead to puddling on the roof and damage to the shingles. This is especially a problem in autumn when leaves fall from nearby trees.

A simple way to check for this is to spray the gutters with a hose and see if water flows freely. If it does not, the gutters are probably clogged and should be cleaned out. If you are going to climb a ladder to perform this inspection, it is best to take proper ladder safety precautions. Make sure the ladder is firmly planted on the ground and enlist a spotter to keep it steady while you inspect and clean the gutters.

While a visual inspection of your roof and gutters can be performed by any homeowner, it is important that you have professionals address any serious issues. A roofing maintenance team will be able to inspect the flashing, roof deck and other parts of the structure that are difficult for the average homeowner to reach. They will also be able to perform gutter cleaning and repair services if necessary.

The Benefits of Window Replacement

New windows are a great way to improve your home’s appearance, save energy, and prevent future damage. There are more options than ever before.

Window Replacement

An entire frame Window Replacement Massachusetts fits into the existing frame, replacing interior and exterior trim. It’s ideal for older homes with deteriorating frames.

One of the biggest benefits of Window Replacement is a higher level of energy efficiency. The insulated frame and glazing technologies of modern windows minimize heat transfer, reducing energy consumption and the burden on heating and cooling systems year-round. That savings translates to lower utility bills and more comfort for homeowners.

In addition to minimizing heat transfer, energy-efficient windows also reduce the amount of solar radiation that enters a home. That means less fading on carpets, curtains, wood furniture, and other fabrics. Windows with low emissivity coatings and double or triple-paned glass are effective at blocking the sun’s harmful UV rays.

There are many different window frames and glazing options available, with each having a distinct impact on the cost and energy efficiency of the product. However, choosing a product that is certified by ENERGY STAR and has a low u-factor rating is always a good idea. U-factor is a measure of the ability of a window to insulate and helps you compare products with similar features. A low u-factor indicates that the window is very efficient, and a high u-factor means it’s not as efficient.

If you choose an insert window, where the existing frames are kept in place, the installation time is shorter and the cost is generally lower. That’s the case even if your old frames need to be replaced because of seal failures or degradation from exposure to weather.

A full frame replacement involves removing the sashes (the framed glass) and replacing them with newer, energy-efficient sashes. That’s more labor intensive and the installation costs are higher than for an insert window, but the result is a far more energy-efficient replacement option.

If you’re considering a full-frame replacement, it’s important to choose an installer that has the experience and expertise required to properly install and maintain these products. That way, you can enjoy the energy efficiency and increased resale value for years to come.

Curb Appeal

You’ve probably heard the phrase, “Don’t judge a book by its cover.” That saying doesn’t quite apply to houses, as prospective buyers often make judgments about a home based on their first impression. If your house doesn’t have the right curb appeal, it can deter potential buyers and reduce its resale value. One of the best ways to improve your home’s curb appeal is by installing replacement windows.

New windows will brighten up the appearance of your home, giving it a fresh and modern look that can improve its overall curb appeal. Replacement windows are available in a wide variety of colors, finishes, and trims that can enhance your home’s exterior. If you want to take your home’s aesthetic even further, you can add decorative accents such as window boxes or outdoor lighting.

Window casing also contributes to your home’s curb appeal, providing a protective layer that is both functional and pleasing to the eye. Unfortunately, age and weather can cause window casing to become loose or crack, which can leave the interior of your home exposed to moisture. Our expert carpenters can replace or repair the casing, ensuring that your home is protected and looking its best.

Additionally, you can choose window designs that match the architectural style of your home to create a cohesive look and add a visual pop of curb appeal. In addition, replacing all the windows in your home at once will help ensure that they are all of the same style, eliminating the possibility of mismatched windows that can spoil your home’s aesthetic.

Another reason to consider window replacement is the fact that it can improve your home’s energy efficiency. Old and outdated windows often allow outside noises to infiltrate your home, which can be disruptive to your quality of life. New windows can effectively block out unwanted sounds, making your home more comfortable. In addition, they will reduce the amount of air that leaks through your windows, lowering your energy costs and keeping you more comfortable all year round.

Increased Value

When it comes to adding value to your home, window replacement is one of the best renovation projects you can undertake. Old windows can make your home look run down and dated, but newer, more energy-efficient windows will give your home a fresh and updated look that appeals to buyers.

Potential buyers will also be pleased with the low energy bills that result from replacing your windows, as well as the improved air quality that results from the tighter seals. Old windows that leak or have poor insulation can lead to high energy bills, while newer double-pane windows will keep the heat inside your home during the winter and the cold outside during the summer.

Whether your existing windows are wood, vinyl or fiberglass, there are many options for replacements. Standard double-hung and picture windows are among the most affordable options, while bay and casement windows add a stylish aesthetic and functionality to your home. If you opt for full-frame replacement, the price will increase depending on the style of window you choose and the materials you select.

Another factor that influences cost is the size of the window you are replacing. For example, installing a larger window in the place of a smaller window will increase your costs because you will need to add framing material to accommodate the size of the new window. If you are replacing a hard-to-reach window, such as a skylight, the cost will increase because it will take your contractor longer to remove and install the new window.

Many homeowners try to save money by performing DIY window replacements. However, this can cause structural damage, water infiltration and poor energy efficiency. In addition, poorly installed or improperly sealed windows can lead to mold and rot in the wood frame and sash, which will cost you more in future repairs. It’s worth the upfront investment to work with a professional installation company that can offer a warranty on their workmanship. You can also ask a local window installer about discounts or financing options that may be available to you.

Aesthetics

Whether you want to upgrade your home for a more modern look or you simply want to make it more beautiful, window replacement is the way to go. There are a lot of different styles and colors to choose from, so you can find something that fits perfectly with your house’s overall aesthetic. Plus, new windows are generally more energy efficient than older ones, so you’ll be able to save money on your energy costs over time.

Depending on the extent of the damage, sometimes it makes more sense to replace a window rather than repair it. This is especially true if the window frame has rotted through or shows signs of rust. In these cases, it’s important to get the issue fixed as soon as possible to prevent further problems, like water leakage and mold growth.

Another sign that it’s time to get a new window is when the windows become difficult to open or close. This can be a huge inconvenience and can also make it more difficult to clean the windows, which is another crucial task that should be done regularly. If your windows are difficult to open, it could be a safety hazard, as it will be more difficult to escape in the event of a fire or other emergency.

Many homeowners are hesitant to get new windows because they worry that they’ll be more expensive than the old ones. However, it’s important to remember that energy efficiency and curb appeal are major benefits of window replacement. This means that over time, you’ll be saving money on your energy bills and adding value to your home.

If you’re interested in upgrading your window, contact us today to learn more about our products and services. We can help you decide which type of window is best for your home and provide a free quote! We have years of experience installing high-quality, attractive windows for our customers. We pride ourselves on providing superior customer service and helping you achieve the home of your dreams. We offer a variety of window types, including new construction and replacement windows. Our replacement windows are available in vinyl, wood, and fiberglass, so you can find the perfect fit for your home’s style and architectural design.

How to Make the Most of Dumpster Rentals

Dumpster Rental In Baltimore MD is a great way to get rid of unwanted items. It is especially helpful when renovating a home or cleaning out your garage. However, it is important to follow the proper rules for dumpster use.

A successful Dumpster Rental business requires a well-executed marketing plan. There are many ways to market your company, including social media, online ads, and PPC advertising.

Dumpster rentals are convenient and cost-effective for disposing of large amounts of waste. They are ideal for construction and renovation projects, as well as major cleanups and home improvements. There are several factors that can affect the cost of renting a dumpster, including the size, location, and duration of the rental.

Some companies charge by the ton, while others include delivery and removal in their price. When choosing a company, customers should ask about these fees before making a decision. Also, it is important to know what types of debris can be thrown into the dumpster, since some items require special disposal methods.

The most common reason to rent a dumpster is to get rid of construction and renovation debris. This can include drywall, flooring, roofing materials, and old furniture. In addition to this, a dumpster can be used to dispose of any other kind of debris that is no longer needed. Another reason for renting a dumpster is to clean out an entire house or office. This can be a time-consuming project, but can help reduce clutter and make the space more usable.

There are many ways to save money on a dumpster rental, including splitting the cost with a neighbor. This is a great option for home renovations and cleanouts, as neighbors will usually be in the same boat and willing to lessen the burden of disposal costs. It is also a good idea to shop around and compare prices before making a decision. Many companies offer discounts during certain times of the year, and it is worth checking to see if any are available.

While it is tempting to wait until the dumpster arrives on site to begin filling it, it is a better idea to prepare the junk beforehand. This will allow the dumpster to be filled quickly and more efficiently, reducing the overall cost. It is also important to remember that different dumpster sizes have a weight limit, and exceeding this limit can result in additional charges. Additionally, heavier trash can be harder for the dumpster provider to haul away, so it is important to keep this in mind.

Dumpsters come in many sizes, and the right size can make a huge difference in the success of your waste disposal project. The best way to determine the proper dumpster size is to ask for advice from experts in the industry, who can offer a range of options based on your project needs. They can also provide guidance about local rules and regulations regarding garbage disposal.

The different dumpster sizes are typically listed by their capacity in cubic yards. This measurement is not an exact science, as it depends on the type and volume of the trash you will be disposing of. However, it is a good guideline to use when choosing a dumpster size. Using the correct dumpster size will ensure that you don’t end up with a messy pile of garbage that is too big to haul away.

There are four common types of dumpsters available for residential use: 10-yard, 20-yard, 30-yard, and 40-yard. These are the most common sizes used in construction and home cleanup projects. Each of these sizes has a unique purpose, so it is important to choose the right one for your project. For example, a 10 yard dumpster is perfect for a small cleanout or garage renovation, while a 20-yard dumpster is ideal for a kitchen or bathroom remodel.

Another important consideration when selecting a dumpster size is the location on your property where it will be placed. For residential use, it’s usually best to leave the dumpster on a driveway or similar accessible area. This will prevent the dumpster from blocking any access points on your property, which could lead to a major inconvenience if it’s not easy to get around it.

It’s also important to consider the type and weight of your waste. Some materials, such as construction debris, can be heavy, while others may be bulky but light in weight. You should also take the duration of your waste disposal project into account. The longer your project, the more waste you will generate. Therefore, it’s a good idea to rent a larger dumpster to ensure that you have enough space for everything you need to dispose of.

If you plan to place your dumpster on public property such as a sidewalk or street, you may need a permit to do so. The permit process varies by city, but usually involves filling out an application form and paying any applicable fee. Some cities also require proof of liability insurance and a waste management plan. The application typically asks for information about the dumpster size, location and duration of rental. You must also ensure that the dumpster will not obstruct street fixtures such as bus stops, loading zones and fire hydrants.

It is advisable to check with your city’s public works department or building department for specific permit requirements. In addition, you should consult with your neighborhood homeowner association (HOA). The HOA will likely have its own permit requirements, even if the city does not.

Permit fees are one of the main factors that determine dumpster rental prices. However, the exact cost will depend on many other factors, including size, location and duration of rental. Generally, the cost of renting a dumpster for a week is less expensive than for an entire month. Local dump and landfill fees are another significant factor in dumpster rental costs. These fees are determined by the location of landfills in your area and vary by region.

The type of trash that can be placed in a dumpster also influences pricing. The most common types of debris include drywall, wood, yard waste and furniture. Other permitted materials include asphalt, brick, concrete and flooring. However, certain items like electronics and spray cans are not allowed in the dumpster. It is best to consult with your dumpster provider for a complete list of permitted and prohibited waste.

It is important to understand that if you place a dumpster in a public space without a permit, it could result in fines and other penalties. Operating a dumpster without a permit can also lead to project delays. In some cases, authorities may issue a cease-and-desist order until you comply with the permit requirements. This can stifle productivity and negatively impact your project budget.

Dumpster rentals are an efficient and convenient way to handle waste disposal for homeowners, contractors, and other businesses. They can be used for a wide variety of projects, including home remodeling, demolition, and construction. While they are a convenient way to get rid of unwanted items, it is important to use them responsibly. Here are some tips on how to make the most of your dumpster rental experience.

Start by evaluating the competition in your area. This will help you identify strengths and weaknesses of your competitors, which will allow you to tailor your marketing strategy to target the right audience. Once you have a clear understanding of the market, you can move on to establishing your business structure. This step will vary by state, but it may include filing paperwork and paying fees. In some cases, you may also need to register your business name and obtain a federal tax ID number (EIN).

Create a solid business plan and financial projections for your dumpster rental company. This will help you determine if your venture is financially viable and will enable you to secure outside funding if necessary. A comprehensive business plan will also help you avoid costly mistakes and make sound decisions for the growth of your company.

The first thing you should do when starting a dumpster rental company is to find an easily accessible spot to put your dumpster. This should be on a hard surface and be large enough to accommodate the truck that will pick it up. You should also ensure that there are no obstructions near or above the dumpster. If you need to place the dumpster on the street, contact your city’s public works or building department to see if you need a permit.

Next, you should hire qualified employees to manage your dumpster rental company. This includes a driver to operate your trucks, as well as an accounting and customer service team. You should also establish a bank account for your business to manage expenses and track revenue and profits. Finally, you should set aside a contingency fund for unexpected costs and emergencies.